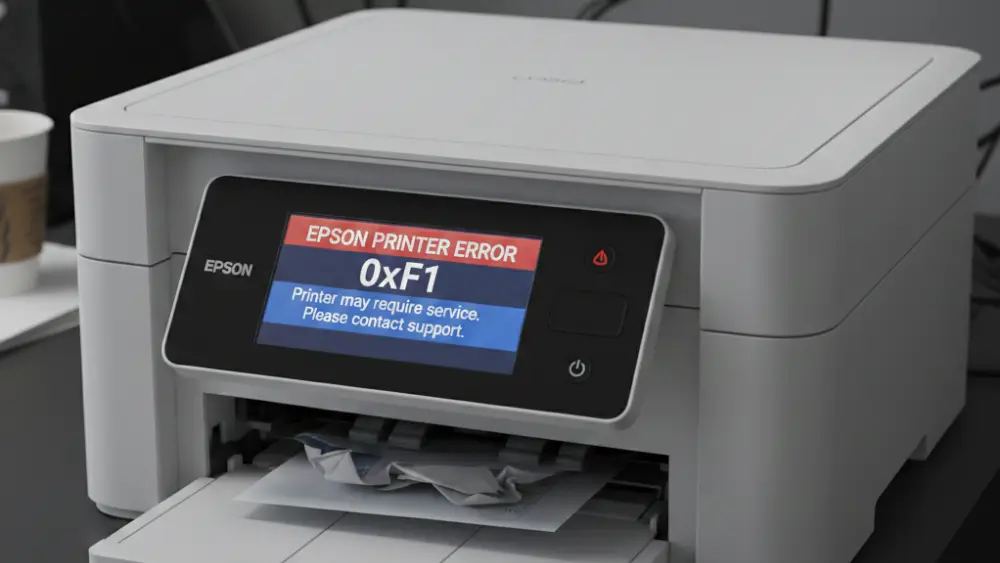
An Epson printer is a reliable workhorse for many, but seeing the cryptic “Epson Printer Error 0xF1” flash on your screen can bring your productivity to a screeching halt.
This error is not just a minor inconvenience; it often points to a deeper issue within your printer’s hardware or software that needs immediate attention.
If you’re staring at this error code, feeling frustrated and unsure of what to do next, you’ve come to the right place.
This guide will walk you through the most common causes of this error and provide clear, step-by-step solutions to get your printer back up and running.
In a Rush? Here’s the Bottom Line:
The Epson Printer Error 0xF1 is typically a hardware-related issue, often caused by a paper jam, a foreign object obstructing the printhead’s path, or a problem with the printer’s internal sensors. This article provides a comprehensive set of solutions, from basic checks to more advanced troubleshooting, designed to help you identify and resolve the problem quickly and efficiently.
Common Causes of Epson Printer Error 0xF1
Understanding the root cause of the Epson Printer Error 0xF1 is the first step toward resolving it.
While the error code itself is quite generic, it almost always points to a physical obstruction or a malfunction in the printer’s intricate paper-handling and printing mechanisms.
In most cases, the error is not a sign of a catastrophic failure but rather a fixable issue that you can often resolve at home. Let’s explore some of the most common culprits behind this frustrating error.
Paper Jams and Foreign Objects
A paper jam is the most frequent cause of the Epson Printer Error 0xF1. Even a small, torn piece of paper lodged deep within the printer’s mechanism can be enough to trigger the error.
Similarly, foreign objects like paper clips, staples, or even dust bunnies can obstruct the printhead’s path, leading to the same error message.
When the printer’s sensors detect that the printhead cannot move freely, it will halt all operations and display the 0xF1 error to prevent further damage.
To resolve this, you will need to carefully inspect the printer’s interior. For detailed guidance on how to safely check for and remove paper jams and other obstructions, you can refer to Epson’s official support page for printer problems.
Printhead and Carriage Issues
The printhead is the heart of your printer, responsible for transferring ink onto the paper. It is mounted on a carriage that moves back and forth across the page.
If the printhead carriage is unable to move freely, it will trigger the Epson Printer Error 0xF1. This can happen for several reasons:
- Obstruction: As mentioned earlier, any physical object blocking the carriage’s path will cause this error.
- Dried Ink and Debris: Over time, dried ink, dust, and other debris can build up on the carriage rail, causing it to stick.
- Dislodged Components: In some cases, a component of the printhead assembly, such as a small spring or plastic lever, may become dislodged and interfere with the carriage’s movement.
Encoder Strip Problems
The encoder strip is a semi-transparent plastic strip that runs the width of the printer, just behind the printhead carriage. This strip is covered in tiny, precise vertical lines that the printhead’s optical sensor reads to determine its exact position.
If the encoder strip is dirty, smudged with ink, or physically damaged, the sensor will be unable to read it correctly, leading to the 0xF1 error. This is a common issue that can be resolved by carefully cleaning the encoder strip.
Paper Feed Motor and Sensor Malfunctions
In addition to the issues mentioned above, the 0xF1 error can also be triggered by problems with the paper feed motor or its associated sensors. The paper feed motor is responsible for driving the rollers that pull paper through the printer.
If this motor malfunctions or if the sensors that monitor its operation become dirty or damaged, the printer may incorrectly believe there is a paper jam or obstruction, even when the paper path is clear. Therefore, it’s important to consider these components when troubleshooting persistent 0xF1 errors.
Step-by-Step Basic Troubleshooting for Epson Printer Error 0xF1
Before diving into more advanced repairs, it’s always a good idea to start with some basic troubleshooting steps.
These simple actions can often resolve the Epson Printer Error 0xF1 without requiring you to open up the printer or perform any complex procedures. Moreover, these steps are safe and easy to perform, making them an ideal starting point for anyone experiencing this error.
Power Cycle Your Printer
The first and simplest step is to perform a complete power cycle of your printer.
This process can clear temporary glitches and reset the printer’s internal state. To do this, turn off your printer using the power button, then unplug the power cable from the wall outlet.
Wait for at least 60 seconds to allow any residual power to dissipate. After waiting, plug the power cable back in and turn the printer on.
In many cases, this simple action can clear the 0xF1 error.
Check for Visible Paper Jams
Next, open all accessible covers and compartments on your printer, including the paper tray, the output tray, and any rear access panels.
Use a flashlight to carefully inspect the entire paper path for any visible paper jams or foreign objects.
If you find any jammed paper, gently pull it out in the direction of the paper path, being careful not to tear it. If the paper does tear, use a pair of tweezers to remove any remaining fragments.
Additionally, check for any small objects that may have fallen into the printer.
Inspect the Printhead Carriage
With the printer powered on and the cover open, observe the printhead carriage as it moves. Listen for any unusual grinding or clicking noises, which could indicate an obstruction or a mechanical problem.
Gently try to move the printhead carriage from side to side by hand. It should move smoothly and freely along the carriage rail.
If it feels stuck or encounters resistance, there may be an obstruction or a buildup of dried ink that needs to be addressed.
Advanced Troubleshooting for Epson Printer Error 0xF1
If you’ve already checked for the more common causes of the Epson Printer Error 0xF1 and the problem persists, it’s time to delve into some more advanced troubleshooting steps.
These steps involve a more detailed inspection of your printer’s internal components. While they may seem daunting at first, they are often necessary to resolve the more stubborn instances of this error.
Before proceeding, make sure your printer is turned off and unplugged to ensure your safety.
Inspecting and Cleaning the Encoder Strip
As mentioned earlier, a dirty or damaged encoder strip is a common cause of the 0xF1 error. If a simple visual inspection didn’t reveal any obvious issues, a more thorough cleaning might be necessary.
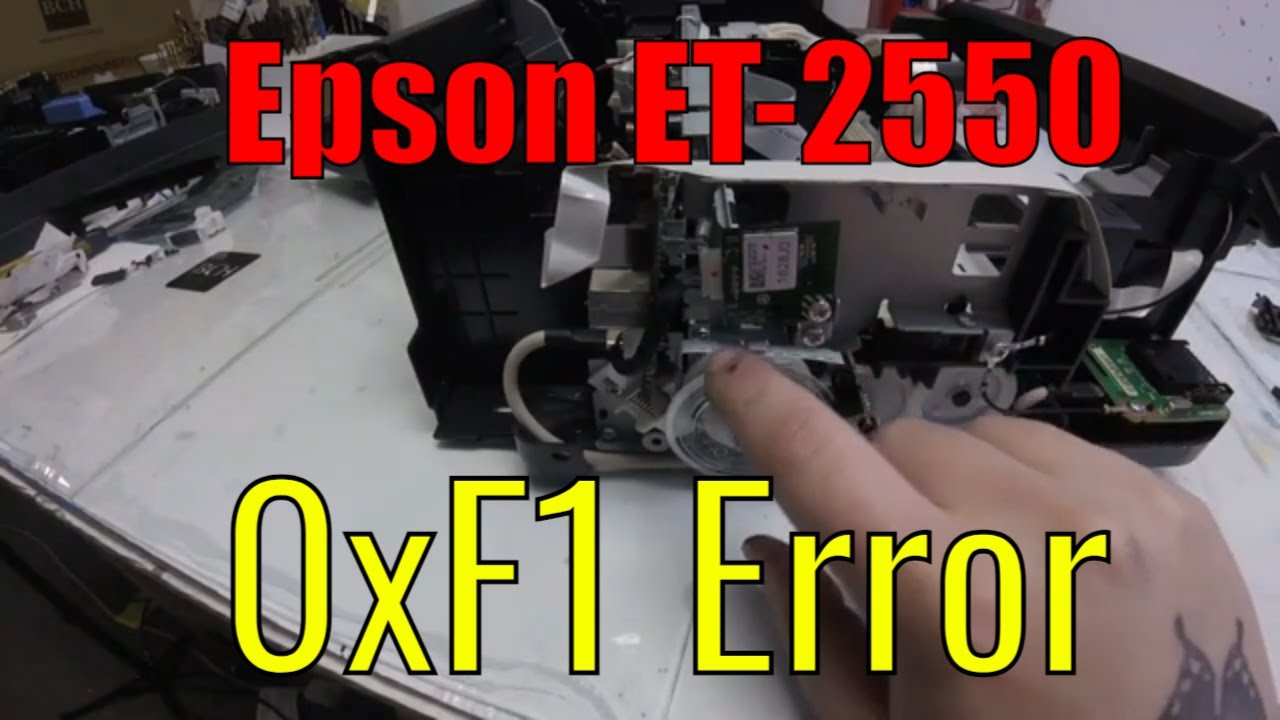
You can find detailed video tutorials that demonstrate the proper technique for cleaning the encoder strip on various Epson models, such as this helpful guide for fixing the Epson ET-2550 0xF1 error (which has hopefully also been embedded above). Here’s a general guide to the process:
- Locate the Encoder Strip: The encoder strip is a clear or semi-clear plastic strip that runs across the width of the printer, usually located just behind or above the printhead carriage rail.
- Use a Lint-Free Cloth: Dampen a clean, lint-free cloth with a small amount of isopropyl alcohol or a dedicated printer cleaning solution.
- Gently Wipe the Strip: Carefully and gently wipe the encoder strip from one end to the other. Be sure to support the strip with your other hand to avoid dislodging it.
- Allow it to Dry: Let the encoder strip dry completely before plugging your printer back in and turning it on.
Checking and Reseating FFC Cables
Flexible Flat Cables (FFC) are the ribbon-like cables that connect the various components of your printer to the main logic board.
If one of these cables becomes loose or disconnected, it can trigger a variety of errors, including the 0xF1 error. The FFC connected to the printhead and the encoder sensor are the most likely culprits.
You can refer to resources from printer technology experts like BCH Technologies for detailed diagrams and step-by-step instructions.
- Access the Internals: You may need to remove a side panel or other housing components to access the FFC cables. Consult your printer’s manual or online resources for model-specific instructions.
- Inspect the Connections: Carefully inspect the FFC connections to the printhead and encoder sensor. Look for any cables that appear to be loose, crooked, or not fully seated in their connectors.
- Reseat the Cables: If you find a loose cable, gently release the locking tab on the connector, carefully pull the cable out, and then reinsert it, ensuring it is straight and fully seated. Then, secure the locking tab.
Addressing Paper Feed (PF) Motor and Encoder Issues
In some cases, the 0xF1 error can be caused by a problem with the Paper Feed (PF) motor or the PF encoder. The PF motor is responsible for driving the rollers that feed paper through the printer, and the PF encoder tracks the paper’s movement.
If either of these components malfunctions, the printer may think there is a paper jam, even when there isn’t one.
Troubleshooting these components is more advanced and may require some technical expertise. It often involves checking for any visible damage to the motor or encoder, ensuring their connections are secure, and in some cases, replacing the faulty component.
If you suspect a problem with the PF motor or encoder, it may be best to consult a professional repair service or refer to a detailed service manual for your specific printer model.
Cleaning the Carriage Rail and Lubrication
Over time, the carriage rail – the metal rod on which the printhead carriage slides – can accumulate dust, dried ink, and other debris. This buildup can cause the carriage to move sluggishly or become stuck, triggering the Epson Printer Error 0xF1.
To address this, you can carefully clean the carriage rail with a lint-free cloth dampened with isopropyl alcohol. After cleaning, you may also apply a small amount of specialized printer lubricant to the rail to ensure smooth movement.
However, be very careful not to over-lubricate, as excess lubricant can attract more dust and debris.
Environmental Factors and Rare Causes of the Epson Printer Error 0xF1
While most instances of the Epson Printer Error 0xF1 are caused by the issues discussed above, there are some less common environmental factors and edge cases that can also contribute to this error.
Understanding these factors can help you troubleshoot more effectively, especially if the standard solutions haven’t worked.
Temperature and Humidity
Extreme temperatures or humidity levels can affect the performance of your printer’s components.
For example, very high humidity can cause paper to absorb moisture and become more prone to jamming. Similarly, very low humidity can cause static electricity to build up, which can interfere with the encoder strip’s sensor.
If you live in an area with extreme weather conditions, try to keep your printer in a climate-controlled environment.
Paper Quality and Type
Using low-quality or incompatible paper can also increase the likelihood of paper jams and other issues that trigger the 0xF1 error. Always use paper that is recommended by Epson for your specific printer model.
Additionally, make sure the paper is stored properly and is not damp, curled, or damaged before loading it into the printer.
Firmware Issues
In rare cases, outdated or corrupted printer firmware can cause unexpected errors, including the Epson Printer Error 0xF1.
Check Epson’s support website for any available firmware updates for your printer model. Installing the latest firmware can sometimes resolve persistent issues that are not caused by hardware problems.
Worn or Damaged Components
After years of use, some of the mechanical components in your printer may simply wear out. This includes the printhead carriage, the paper feed rollers, and various sensors.
If you’ve tried all the troubleshooting steps and the error persists, it’s possible that one or more of these components has reached the end of its lifespan and needs to be replaced. In such cases, consulting a professional repair service is often the most cost-effective solution.
Preventative Maintenance Tips
Once you’ve successfully resolved the Epson Printer Error 0xF1, it’s important to take steps to prevent it from recurring. Regular preventative maintenance can significantly extend the life of your printer and reduce the likelihood of encountering errors.
Here are some practical tips to keep your printer running smoothly.
Regular Cleaning
Make it a habit to clean your printer’s interior at least once every few months.
Use a soft, lint-free cloth to wipe down the carriage rail, the encoder strip, and the paper path. Remove any dust, debris, or dried ink that you find.
This simple maintenance task can prevent many common printer problems.
Use Quality Paper
Always use high-quality paper that is appropriate for your printer. Cheap or incompatible paper is more likely to jam and can leave behind fibers that clog the printer’s mechanisms.
Store your paper in a cool, dry place to prevent it from absorbing moisture.
Avoid Overloading the Paper Tray
Don’t overfill the paper tray. Overloading can cause the paper to feed improperly, leading to jams and errors. Follow the manufacturer’s recommendations for the maximum number of sheets that the tray can hold.
Keep Firmware Updated
Periodically check for firmware updates on Epson’s support website. Installing the latest firmware can improve your printer’s performance and fix known bugs that may cause errors.
Address Issues Promptly
If you notice any unusual noises, printing quality issues, or error messages, address them promptly. Ignoring small problems can lead to more serious issues down the line. Early intervention can often prevent costly repairs.
Final thoughts on Epson Printer Error 0xF1
Encountering the Epson Printer Error 0xF1 can certainly be a frustrating experience, but it is often a problem that can be resolved with a bit of patience and troubleshooting.
By systematically working through the steps outlined in this guide, from the simple to the more advanced, you can significantly increase your chances of fixing the error without needing to call in a professional.
Remember to always prioritize safety by turning off and unplugging your printer before you begin any internal inspections or cleaning.
To prevent this error from recurring, it is a good practice to perform regular maintenance on your printer. This includes keeping the interior clean from dust and debris, using high-quality paper, and being mindful of any unusual noises or printing behavior.
Should you continue to experience issues, don’t hesitate to consult Epson’s official support resources or a qualified printer technician.
With the right approach, you can keep your Epson printer running smoothly for years to come.
Frequently Asked Questions (FAQ)
What is the most common cause of the Epson Printer Error 0xF1?
The most common cause of this error is a paper jam or a foreign object obstructing the printhead’s path. Even a small piece of torn paper can be enough to trigger the error. It is always the first thing you should check for when you encounter this error.
Can a dirty encoder strip really cause the 0xF1 error?
Yes, absolutely. The encoder strip is a critical component that tells the printer the exact position of the printhead. If it is dirty, smudged with ink, or damaged, the printer can lose track of the printhead’s position and generate the 0xF1 error. Gently cleaning the encoder strip often resolves the issue.
Is it safe to clean the inside of my printer myself?
Yes, it is generally safe to clean the inside of your printer as long as you take the proper precautions. Always turn off and unplug your printer before you begin. Use a soft, lint-free cloth and avoid using any harsh chemicals or solvents unless they are specifically designed for printer cleaning.
When should I consider calling a professional for the 0xF1 error?
If you have tried all the troubleshooting steps in this guide, including checking for paper jams, cleaning the encoder strip, and reseating the FFC cables, and the error still persists, it may be time to call a professional.
The problem could be a more serious hardware issue, such as a faulty motor or a damaged logic board, which requires expert diagnosis and repair.
Does the 0xF1 error affect all Epson printer models?
While the 0xF1 error can occur on many Epson printer models, it is particularly common on EcoTank printers like the ET-2550, L575, and WorkForce models such as the WF-3640. However, the underlying causes and troubleshooting steps are generally similar across different models.
How to Clear a Paper Jam to Fix an Epson 0xF1 Error
A paper jam is the most common cause of the Epson 0xF1 error. This step-by-step guide will walk you through the process of safely clearing a paper jam and getting your printer back to working condition. The entire process typically takes about 15 minutes and requires minimal tools.
What You’ll Need:
- A flashlight
- A pair of tweezers (optional)
Steps to Clear the Paper Jam:
- Turn Off and Unplug the Printer: Before you begin, turn off your printer and unplug it from the power source to prevent any electrical shock or damage to the printer. This is an essential safety step that should never be skipped.
- Open the Printer Cover: Open the main cover of your printer to access the internal components. You may also need to open the rear access panel if your printer has one. This will give you a clear view of the paper path.
- Locate the Jammed Paper: Use a flashlight to carefully inspect the paper path for any jammed paper. Look in the paper tray, the output tray, and the area around the printhead. Sometimes, small pieces of torn paper can be hidden in hard-to-see areas.
- Gently Remove the Paper: Once you have located the jammed paper, gently pull it out in the direction of the paper path. If the paper tears, use a pair of tweezers to remove any small, remaining pieces. Be patient and avoid using excessive force, as this could damage the printer’s internal mechanisms.
- Check for Foreign Objects: While you have the printer open, take a moment to check for any other foreign objects that may be obstructing the paper path, such as paper clips, staples, or dust bunnies. Removing these objects now can prevent future jams.
- Close the Printer and Power On: Once you are sure that the paper path is clear, close all the printer covers, plug the printer back in, and turn it on. The printer should initialize without the 0xF1 error. If the error persists, you may need to try some of the more advanced troubleshooting steps outlined earlier in this article.
Finally be sure to check out our Tech Troubleshooting FAQ or our Printer Troubleshooting Tips pages for even more general tips that cover a wide range of technical problems and solutions.
(If after reading the above article you still have the Epson Printer Error 0xF1, then you might find a much less obvious solution on the above tech page!)