Getting your trusted Brother printer on a new router is a common hurdle many people face, but the good news is that it’s almost always fixable.
This comprehensive guide will walk you through everything you need to know, from the simple fixes to the more advanced troubleshooting steps, so you can get back to printing without the frustration.
So if you have just upgraded your home or office with a shiny new router, and everything is faster and more reliable – except for your Brother printer, which has suddenly decided to go on strike – do not worry as help is below!
Brother Printer On A New Router Quick-Fix Summary
If you’re in a hurry, here’s the bottom line: reconnecting your Brother printer to a new router usually involves running the wireless setup wizard on your printer’s control panel to connect it to the new Wi-Fi network.
This article is for anyone who has recently changed their router and is now having trouble getting their Brother printer to connect and print over the new wireless network.
Common Causes of Brother Printer on a New Router Issues
Understanding why your printer isn’t connecting is the first step toward fixing the problem.
In most cases, the issue boils down to one of a few common culprits.
Let’s take a look at what might be going on.
Incorrect Wi-Fi Credentials
It might sound obvious, but a simple typo when entering your new Wi-Fi password is one of the most frequent reasons for the Brother printer on a new router connection failure.
Your new router has a new network name (SSID) and password, and your printer needs to know exactly what they are to connect.
Even a single incorrect character will prevent the connection from being established.
When you go through the setup process, double-check every character you enter.
Dual-Band Router Confusion (2.4 GHz vs. 5 GHz)
Modern routers are often dual-band, meaning they broadcast two separate Wi-Fi networks: a 2.4 GHz band and a 5 GHz band.
While the 5 GHz band is faster, many printers, including most Brother models, can only connect to the 2.4 GHz band, as confirmed by Brother’s official documentation.
If your computer is on the 5 GHz network and your printer is trying to connect to the same one, it won’t work.
It’s crucial to ensure your printer is specifically connecting to the 2.4 GHz network.
Some routers combine both bands under a single network name, which can cause confusion for some devices.
If you’re having trouble, it’s a good idea to give the 2.4 GHz and 5 GHz networks different names in your router’s settings.
Outdated Printer Firmware or Drivers
Technology is always evolving, and that includes the software that runs your printer and connects it to your computer.
If your printer’s firmware (the software embedded in the printer itself) or the printer drivers on your computer are outdated, they may not be able to communicate effectively with your new, more modern router.
Keeping both your printer’s firmware and your computer’s drivers up to date is an important step in preventing and resolving connectivity issues.
Network Security Mismatch (WPA2-AES)
Wireless security protocols are essential for keeping your network safe, but they can also be a source of connection problems if your devices aren’t on the same page.
Most modern routers use WPA2 security with AES encryption, which is the current standard.
However, some older Brother printers might have trouble with this, or your router might be set to a different security mode.
Brother’s official documentation states that their machines support WPA2-PSK with AES encryption, and using other settings like TKIP can lead to connection failures, as detailed in their explanation of wireless security protocols.
Advanced Troubleshooting for Your Brother Printer on a New Router
If you’ve checked for the common causes and your printer still isn’t connecting, it’s time to dig a little deeper.
These advanced troubleshooting steps will help you tackle more complex issues and get your printer back online.
Dealing with Mesh Network Complications
Mesh Wi-Fi systems are fantastic for providing seamless coverage throughout your home, but they can sometimes introduce complications for devices like printers.
Because a mesh network uses multiple nodes that all broadcast the same network name, your printer might get confused and repeatedly drop its connection.
If you’re using a mesh system, Brother recommends separating the 2.4 GHz and 5 GHz bands into two differently named networks and connecting your printer exclusively to the 2.4 GHz network.
It’s also worth noting that Brother has identified specific issues with EERO mesh routers (as stated in the first Brother help link above), and in those cases, they recommend a wired Ethernet connection as the most reliable solution.
Indeed even EERO seem to want to persuade you to use Ethernet to connect printers to EERO routers as their routers have security settings too strict for some printers.
When Your Printer Can’t Find the Network (Hidden SSID)
For security reasons, some people choose to hide their Wi-Fi network’s name, meaning it won’t show up in the list of available networks.
If you have a hidden network, your printer won’t be able to find it on its own.
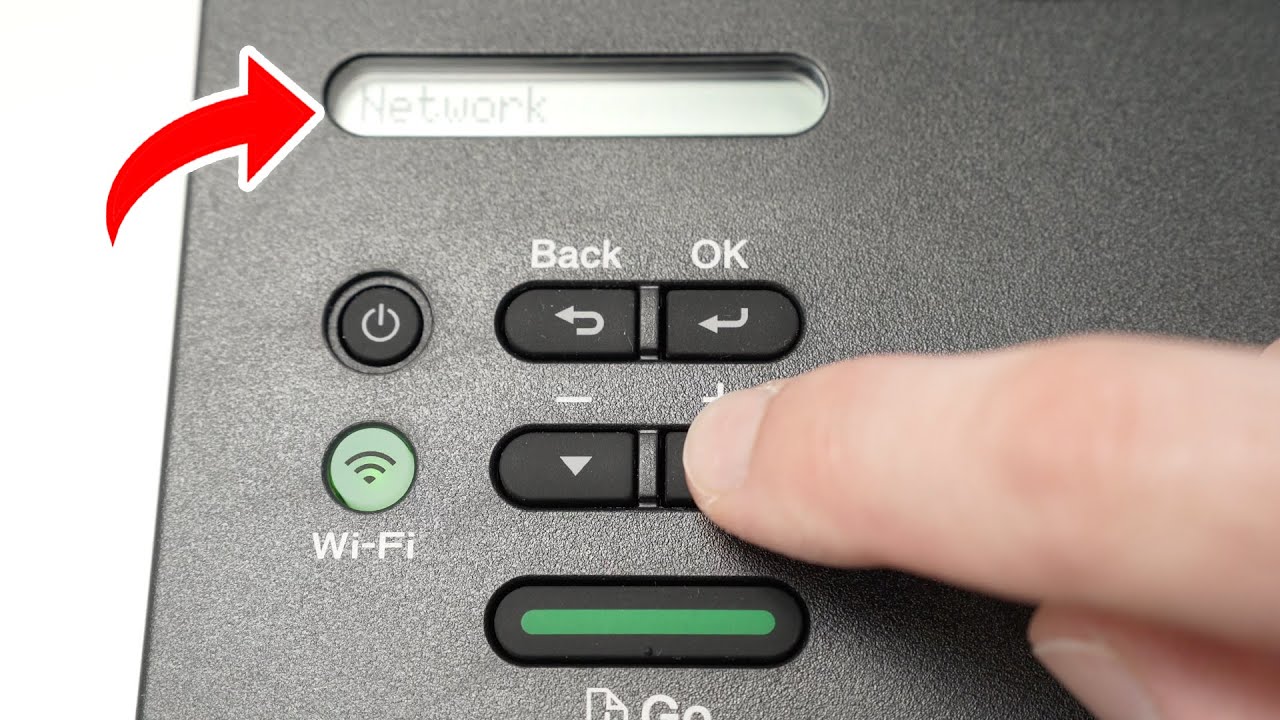
You’ll need to manually enter the network name (SSID) and password into your printer’s control panel.
This process can be a bit tedious, but it’s a necessary step if you want to keep your network hidden.
For a visual guide on how to perform a manual wireless setup, this helpful YouTube video walks you through much of the process, although it does not actually show typing in a SSID (anyway the video is hopefully also embedded below!)
Using the Network Connection Repair Tool
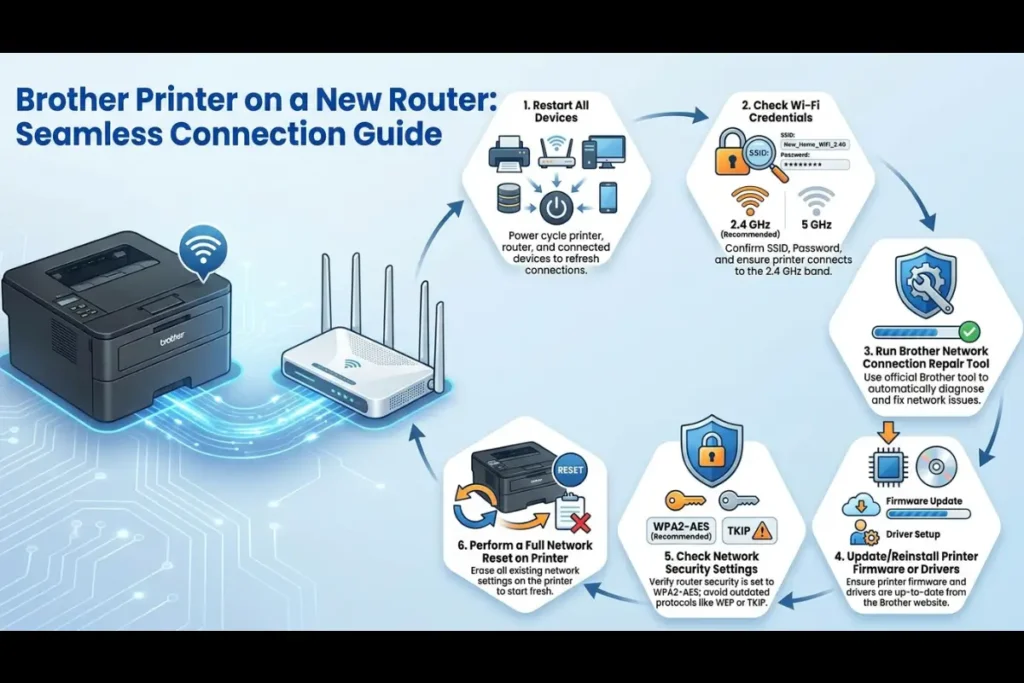
If you’re still stuck, Brother provides a handy utility called the Network Connection Repair Tool (which you should really find by searching their site for your device model and looking under “Downloads”!)
This software, available for download from the official Brother support website (like this for example), can automatically diagnose and fix a wide range of network connection issues.
It will scan your network, identify your printer, and ensure that your computer’s printer driver is configured with the correct IP address.
Running this tool can often resolve stubborn connection problems with just a few clicks.
Performing a Full Network Reset
When all else fails, sometimes the best solution is to start fresh.
Performing a full network reset on your Brother printer will erase all of its existing network settings and return it to its factory defaults.
This will allow you to go through the wireless setup process from the very beginning, ensuring that there are no old or incorrect settings causing a conflict.
You can find instructions on how to perform a network reset for your specific model in the user manual or on the Brother support website.
Final thoughts on Brother Printer on a New Router
Successfully connecting your Brother printer to a new router can sometimes feel like a technical puzzle, but with a bit of patience and the right knowledge, it’s a puzzle you can definitely solve.
By working through the common causes and advanced troubleshooting steps in this guide, you’ll be well-equipped to tackle any connectivity issues that come your way.
Remember to start with the simple solutions first, like double-checking your password and ensuring you’re on the correct Wi-Fi band, before moving on to more advanced steps like using the Network Connection Repair Tool or performing a network reset.
With these tips in hand, you’ll have your Brother printer back up and running on your new router in no time.
Frequently Asked Questions
Why won’t my Brother printer connect to my new Wi-Fi?
There are several reasons why your Brother printer might not be connecting to your new Wi-Fi.
The most common culprits include entering the wrong Wi-Fi password, trying to connect to the wrong Wi-Fi band (most Brother printers only support 2.4 GHz), or having outdated printer firmware or drivers.
It’s also possible that your router’s security settings are not compatible with your printer.
How do I get my Brother printer to recognize my new router?
To get your Brother printer to recognize your new router, you’ll need to run the wireless setup wizard from the printer’s control panel.
This will allow you to search for available Wi-Fi networks and select your new router’s network name (SSID).
You will then be prompted to enter the new Wi-Fi password to complete the connection.
Can I connect my Brother printer to a 5 GHz Wi-Fi network?
No, most Brother printers are not compatible with 5 GHz Wi-Fi networks. They can only connect to the 2.4 GHz band.
If you have a dual-band router, you’ll need to make sure that you are connecting your printer to the 2.4 GHz network.
You may need to give your 2.4 GHz and 5 GHz networks different names to avoid confusion.
How to Connect Your Brother Printer to a New Router
Now that we’ve covered the common issues and troubleshooting steps, let’s walk through the exact process of connecting your Brother printer to your new router.
This method works for most Brother printer models with a control panel and display.
What You’ll Need:
- Your new router’s Wi-Fi network name (SSID)
- Your new router’s Wi-Fi password
- Your Brother printer with a control panel
Estimated Time: 5 minutes
Step 1: Start the Wireless Setup Wizard
On your Brother printer’s control panel, press the Menu or Settings button.
Use the arrow keys to navigate to the ‘Network’ or ‘WLAN’ menu, and then select ‘Setup Wizard’.
This will initiate the wireless connection process.
Step 2: Select Your New Wi-Fi Network
The printer will search for available wireless networks in your area.
Use the arrow keys to scroll through the list and select the name (SSID) of your new router’s 2.4 GHz network.
Press OK to confirm your selection.
If you don’t see your network, it may be hidden, or you may need to move the printer closer to the router.
Step 3: Enter Your Wi-Fi Password
You will be prompted to enter the network key (password).
Carefully use the printer’s keypad or on-screen keyboard to enter your new Wi-Fi password.
Remember that passwords are case-sensitive, so pay close attention to uppercase and lowercase letters.
Press OK when you’re done.
Step 4: Confirm and Connect
The printer will ask you to apply the settings.
Select ‘Yes’ to confirm.
The printer will then attempt to connect to your new router.
Once connected, the printer’s Wi-Fi indicator light will turn solid green, and it may print a connection report showing the successful connection.
If the connection fails, the printer will display an error message, and you should double-check your password and try again.
Finally be sure to check out our Tech Troubleshooting FAQ or our Printer Troubleshooting Tips pages for even more general tips that cover a wide range of technical problems and solutions.
(If after reading the above article you still have a “Brother Printer on a New Router” problem, then you might find a much less obvious solution on the above tech pages!)