You don’t need the physical disc to get a Brother printer up and running. In fact, performing a Brother printer installation without CD is often the recommended method, as it ensures you are using the most up-to-date software and drivers available.
This article will guide you through the entire process, from finding the correct drivers online to troubleshooting common issues that may arise.
In Short: Your Guide to a CD-Free Printer Setup
This article is for anyone who needs to install a Brother printer without the original installation disc.
We will cover how to download the necessary software directly from Brother’s official website, walk through the installation steps for both Windows and macOS, and provide solutions for common problems.
By following these instructions, you can ensure a smooth and successful setup.
Why You Can Do A Brother Printer Installation Without CD
In the past, installation CDs were essential for installing new hardware. They contained all the necessary drivers and software required for your computer to communicate with the device.
However, technology has evolved, and today, most manufacturers, including Brother, provide all the necessary resources online.
There are several advantages to this approach:
- Up-to-Date Software: The drivers and software available online are always the most current versions. This means they will include the latest features, bug fixes, and security patches, ensuring optimal performance and compatibility with your operating system.
- Convenience: You can access the installation files from any computer with an internet connection, at any time. This is especially useful for modern laptops and computers that no longer come with a CD/DVD drive.
- Comprehensive Resources: Besides drivers, you can also find user manuals, FAQs, and troubleshooting guides on the manufacturer’s support website, providing a one-stop-shop for all your printer-related needs.
Preparing for Your Brother Printer Installation Without CD
Before you begin the installation process, there are a few preparatory steps you should take to ensure everything goes smoothly.
Taking a moment to prepare can save you a lot of time and frustration later on.
First, make sure your printer is properly connected to a power source and turned on.
If you plan to use a USB connection, ensure you have the correct cable and that it is securely plugged into both the printer and your computer.
For wireless printers, ensure the printer is within range of your Wi-Fi network and that you know your network’s name (SSID) and password.
Next, it is important to know your printer’s model number and your computer’s operating system.
The model number is usually located on the front or top of the printer, and the operating system information can be found in your computer’s system settings.
Having this information ready will make it much easier to find the correct drivers and software.
Step-by-Step Guide: Brother Printer Installation Without CD
With the preparatory steps out of the way, you are now ready to begin the installation process.
The following steps will guide you through downloading and installing the necessary software for your Brother printer.
Step 1: Visit the Official Brother Support Website
The first and most important step is to navigate to the official Brother support website. It is crucial to download drivers only from the official source to avoid potential security risks from third-party websites.
Step 2: Find Your Printer Model
Once you are on the support website, you will need to locate the downloads for your specific printer model.
You can usually do this by entering your model number into a search bar or by browsing through a list of product categories.
After selecting your model, you will be taken to a page with all the available downloads.
Step 3: Download the Correct Drivers and Software
On the downloads page, you will need to select your operating system (e.g., Windows 11, macOS 13.x) from a dropdown menu. The website will then display a list of compatible drivers and software.
In most cases, it is best to download the Full Driver & Software Package. This package contains everything you need to get your printer fully functional, including the printer driver, scanner driver (if applicable), and other useful utilities.
Step 4: Run the Installer and Follow the On-Screen Instructions
After the download is complete, locate the downloaded file on your computer and double-click it to run the installer.
The installation wizard will guide you through the rest of the process.
You will be asked to agree to the license terms, choose your connection type (USB or wireless), and the installer will then copy the necessary files to your computer.
Follow the on-screen instructions carefully, and your printer will be ready to use in no time.
For those who prefer a visual guide, you can watch a helpful video (hopefully embedded below) on how to install a printer without the CD/DVD driver, which provides a general overview of the process.
Common Causes of Brother Printer Installation Without CD Issues
Even with the correct drivers, you may occasionally run into issues during the installation process.
Understanding the common causes of these problems can help you resolve them more quickly.
Incorrect Driver or Operating System Selection
One of the most frequent causes of installation failure is selecting the wrong driver for your printer model or an incompatible driver for your operating system.
Always double-check that you have selected the correct model and OS version on the Brother support website before downloading.
Network Connectivity Problems
For wireless printers, a stable network connection is essential for a successful installation.
If the installer cannot detect your printer, it could be due to a weak Wi-Fi signal, incorrect network settings, or a firewall blocking the connection.
Ensure your printer is connected to the same network as your computer and that the network is functioning correctly.
USB Connection Issues
If you are using a USB connection, a faulty cable or port can prevent your computer from recognizing the printer.
Try using a different USB cable or plugging the cable into a different USB port on your computer.
It is also a good practice to connect the printer directly to your computer, rather than through a USB hub.
Advanced Troubleshooting for Brother Printer Installation Without CD
If you have tried the basic troubleshooting steps and are still having trouble, there are some more advanced techniques you can use to resolve the issue.
Manually Adding the Printer in Windows
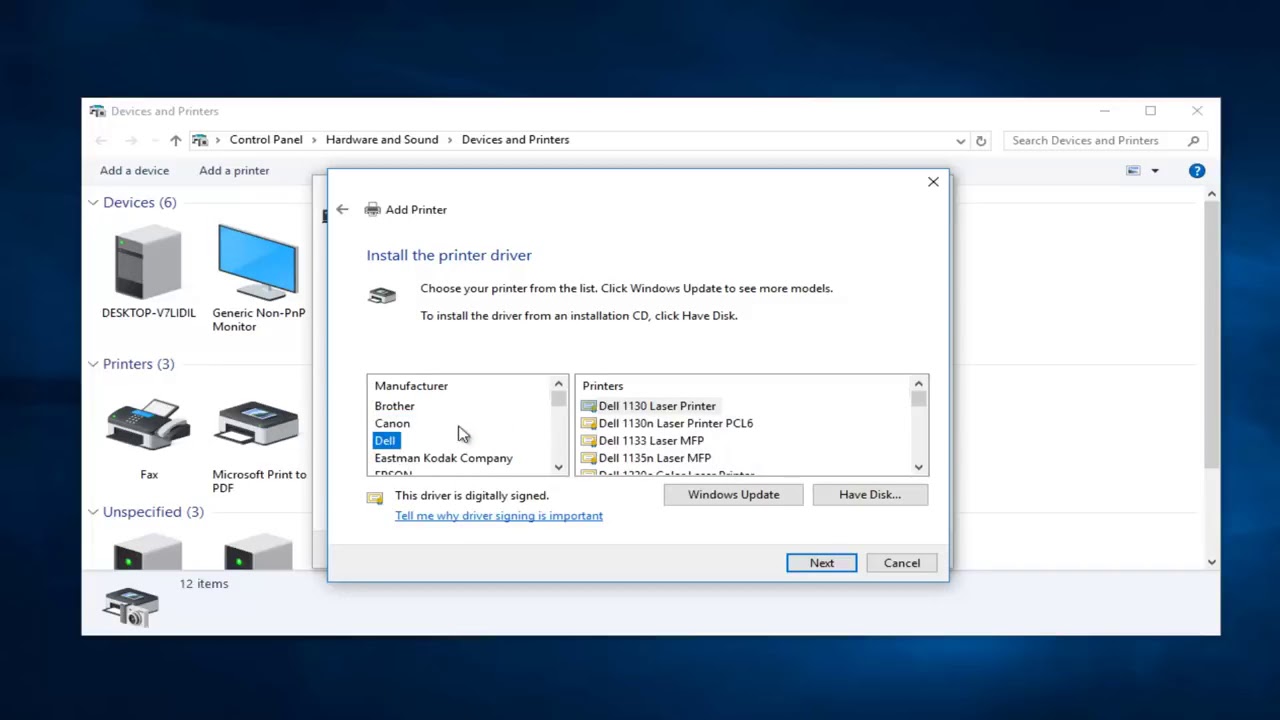
If the automatic installation fails, you can try manually adding the printer through the Windows settings.
Go to Settings > Bluetooth & devices > Printers & scanners and click on Add device. Windows will attempt to locate your printer.
If it doesn’t appear, you can click on “Add manually” and follow the prompts to install the printer using the drivers you downloaded.
For more detailed instructions, you can refer to Microsoft’s guide on how to add a printer in Windows.
Resetting the Printer and Network Settings
In some cases, resetting the printer’s network settings to their factory defaults can resolve stubborn connectivity issues.
You can usually do this through the printer’s control panel menu.
After resetting, you will need to reconnect the printer to your Wi-Fi network and try the installation process again.
Checking for Software Conflicts
Sometimes, existing printer software or security software on your computer can interfere with the installation of a new printer.
Try temporarily disabling your antivirus or firewall software to see if that resolves the issue.
If you have previously installed other printer drivers, it may be helpful to uninstall them before attempting to install your new Brother printer.
Final thoughts
Successfully completing a Brother printer installation without CD is a straightforward process when you know where to find the right resources.
By downloading the latest drivers and software from the official Brother support website, you can ensure your printer is set up for optimal performance and compatibility.
While you may encounter some bumps along the way, the troubleshooting steps outlined in this article should help you resolve most common issues.
With a little patience, you’ll have your Brother printer up and running in no time, ready to handle all your printing needs.
Frequently Asked Questions (FAQ)
Can I use a generic driver for my Brother printer?
While some operating systems may offer generic drivers, it’s always best to use the official Brother drivers for your specific model. This ensures full functionality, including scanning and other features. Generic drivers may only provide basic printing capabilities.
What should I do if my printer is not detected during wireless setup?
First, ensure your printer and computer are on the same Wi-Fi network. Check your router’s settings and temporarily disable any firewalls. You can also try restarting your printer, router, and computer to reset the connection.
How often should I update my printer drivers?
It’s a good practice to check for driver updates every few months or if you encounter any issues. Brother regularly releases updates to improve performance and fix bugs. You can find the latest drivers on the official Brother support website.
Can I install my Brother printer on a Mac without the CD?
Yes, the process is very similar to Windows. Visit the Brother support website, select your printer model and macOS version, and download the appropriate driver package. Apple also provides guidance on adding a printer on their support page.
How to perform a Brother Printer Installation Without CD
Description: A step-by-step guide to installing your Brother printer using drivers downloaded from the official website.
Total Time: 15 minutes
Supplies:
- Brother Printer
- Computer (Windows or macOS)
- USB cable (for wired connection)
- Wi-Fi network credentials (for wireless connection)
Tools:
- Web browser
Steps:
- Power On and Connect: Turn on your Brother printer and connect it to your computer via USB or to your Wi-Fi network.
- Visit Brother Support: Open a web browser and go to the official Brother support website.
- Find Your Model: Locate your printer model by using the search function or browsing the product categories.
- Select Your OS: Choose your computer’s operating system (e.g., Windows 11, macOS 13.x).
- Download Software: Download the “Full Driver & Software Package” for your printer.
- Run Installer: Open the downloaded file and follow the on-screen instructions to complete the installation.
Finally be sure to check out our Tech Troubleshooting FAQ or our Printer Troubleshooting Tips pages for even more general tips that cover a wide range of technical problems and solutions.
(If after reading the above article you still have a problem performing a “Brother Printer Installation Without CD”, then you might find a much less obvious solution on the above tech pages!)